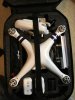
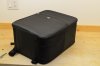
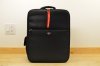
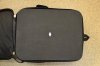
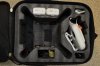
Here's my carrying bag. Bought it on eBay for $24 and change, shipped from within the US, arrived in a matter of days. Outer shell seems to be the same as a dozen other bags you can find on eBay and Amazon. I went for the cheapest I could find, as I had no reasons to believe the more expensive clones were actually better. The inner foam is made of several identical layers, glued together to form a single shell. Such layers are not very well aligned, and in any case the shell did require some mods:
- Biggest change was to cut out a rather large portion of the foam (on the left in the photo below) to make room for the props (and spares), which otherwise have no place to go. I did an approximate first cut to remove a big chunk of foam, then used some masking tape to mark where to cut and go straight, and it came out quite nice and clean. Took me forever to decide to do it, but it was well worth it and I strongly recommend it, you gain a lot of very usable space.
- The cutouts for the two batteries were too close, so I did remove a small portion on the opposite sides of the cutout to make room for the protruding connector block of the batteries (more difficult to explain than to do). That was enough to prevent them to be forced against each other.
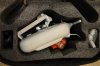
- I did also cut 4 small squares at the bottom, where the landing gear pads are. This was done to let the P3S sit a few millimeters down in the foam, so the motor shafts don't stick out too much at the top.
- Added a small piece of very soft foam on the bottom, right where the camera sits, to help keeping the camera steady (even if I use the gimbal lock, of course).
- Major pain in the neck was to make room for the remote, since I have the Inspire 1 tablet mount (side note: well worth the price). Tried a few methods (Dremel, soldering iron, knife) and then settled for 60 or 80-grit sandpaper: it does leave a bit of a "hairy" finish, rather than the clean cut of a knife, but it allowed me to do curved surfaces and to work the foam a bit at a time. I used the same sandpaper method elsewhere around the remote, as the original cutout was a bit too tight.
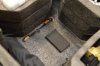
- I got a piece of hard-density fiberboard (very cheap, from Home Depot) and cut 3 parts out of it: one shaped like the bag, which I keep on top of the foam cover and also acts as landing pad (painted black and with a DJI sticker on it to make it look better); another with identical shape but with big cutouts to make it lighter, at the bottom (under the foam); a third small piece between the foam shell and the bag itself (on the left side of the photo) to give a bit of extra protection and support, where I cut out the foam to make room for the props.
In the bag I also always carry my FAA registration, FAA LiPo rules, airline-specific LiPo rules, copy of my homeowner insurance (liability) and a copy of model aircraft regulations for the US (and countries where I'm going). Spare props, charger, tablet, lanyard, couple zip-ties, and that's about it.
It's not exactly a high-quality setup, but for the price quite frankly it does everything I need. Time will tell about durability etc.