Hi everyone,
Well, turns out my P2V+ has fallen victim to the Wi-fi module problem. No video in the app, telemetry working fine. I tried the fix mentioned around a lot and reflashed the module using a USB serial adapter, but the board is definitely gone. My P2V+ is one of the V2.0, with a Itelite antenna installed on the controller.
I considered selling the aircraft or dismantling for parts, but here in Brazil the parts are worth nothing, and replacing the module would cost me a kidney, without knowing how long until the new module failed too. The price for an alternate FPV kit + used mini iOSD + Arduinos is less than the cost for a replacement wi-fi module here.
So, I decided to hack the s**t out of this.
I removed the wi-fi module entirely, and since the stock camera and gimbal still work through the camera's button, I plan to mod the Phantom in two phases, so I would be able to keep using the aircraft while gathering everything I need for the second phase of the upgrade or until I destroy the stock gimbal/camera which I don't intend to replace. I have a 3D printer which I can print the needed parts on.
PHASE ONE:
1. Install a 1.2ghz FPV transmitter using the video signal from the stock camera.
2. Install a 1.2ghz FPV monitor on the stock controller
3. Mount an Arduino on the Phantom and one on the controller with a 2.4ghz shield on each
4. Use the Itelite antenna for the 5.8ghz controller and the 2.4ghz Arduino comm
5. Control the stock camera's button (maybe with an optocoupler) via the Arduino for taking pictures and recording video, using the camera's LED for receiving the camera status back on the controller
6. Install the following switches and status LEDs on the controller:
- Picture button (controlled via the Arduino)
- Video record button (controlled via the Arduino)
- Gimbal tilt lever (7th channel stock potentiometer)
7. Install a mini iOSD for receiving telemetry back on the monitor
PHASE TWO:
1. Replace the stock camera with a GoPro / ZenMuse gimbal using the 1.2ghz FPV
2. Install a small 360 camera somewhere on the Phantom, triggered by the Arduino
3. Relocate compass to an external pole
4. Install a retractable landing gear activated manually and automatically via ultrasound sensor
5. Install switches for controlling the landing gear / 360 camera / hook / etc
6. (Maybe) Install a servo and hook for load dropping, controlled via the Arduino
7. (Maybe) Install a small smd LED spotlight in front of the Phantom
Components I'm considering using:
- Phantom 2 Vision + with the wi-fi module removed
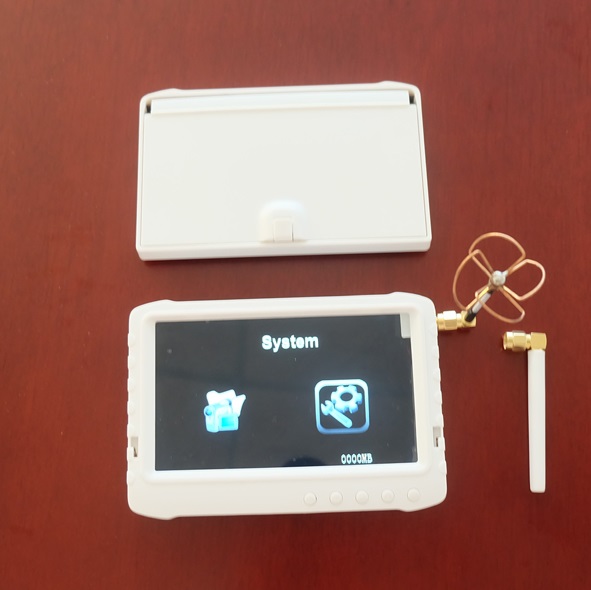
- 1.2ghz FPV kit

- 1.2ghz FPV monitor with battery
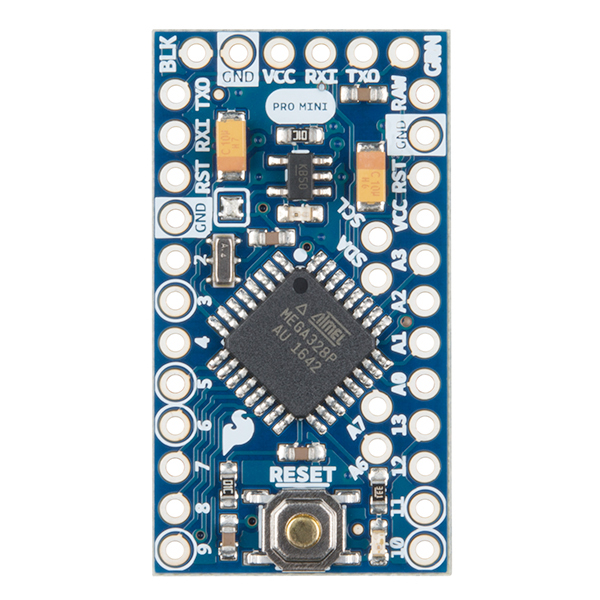
- Arduino Pro Mini (I already have two of these)
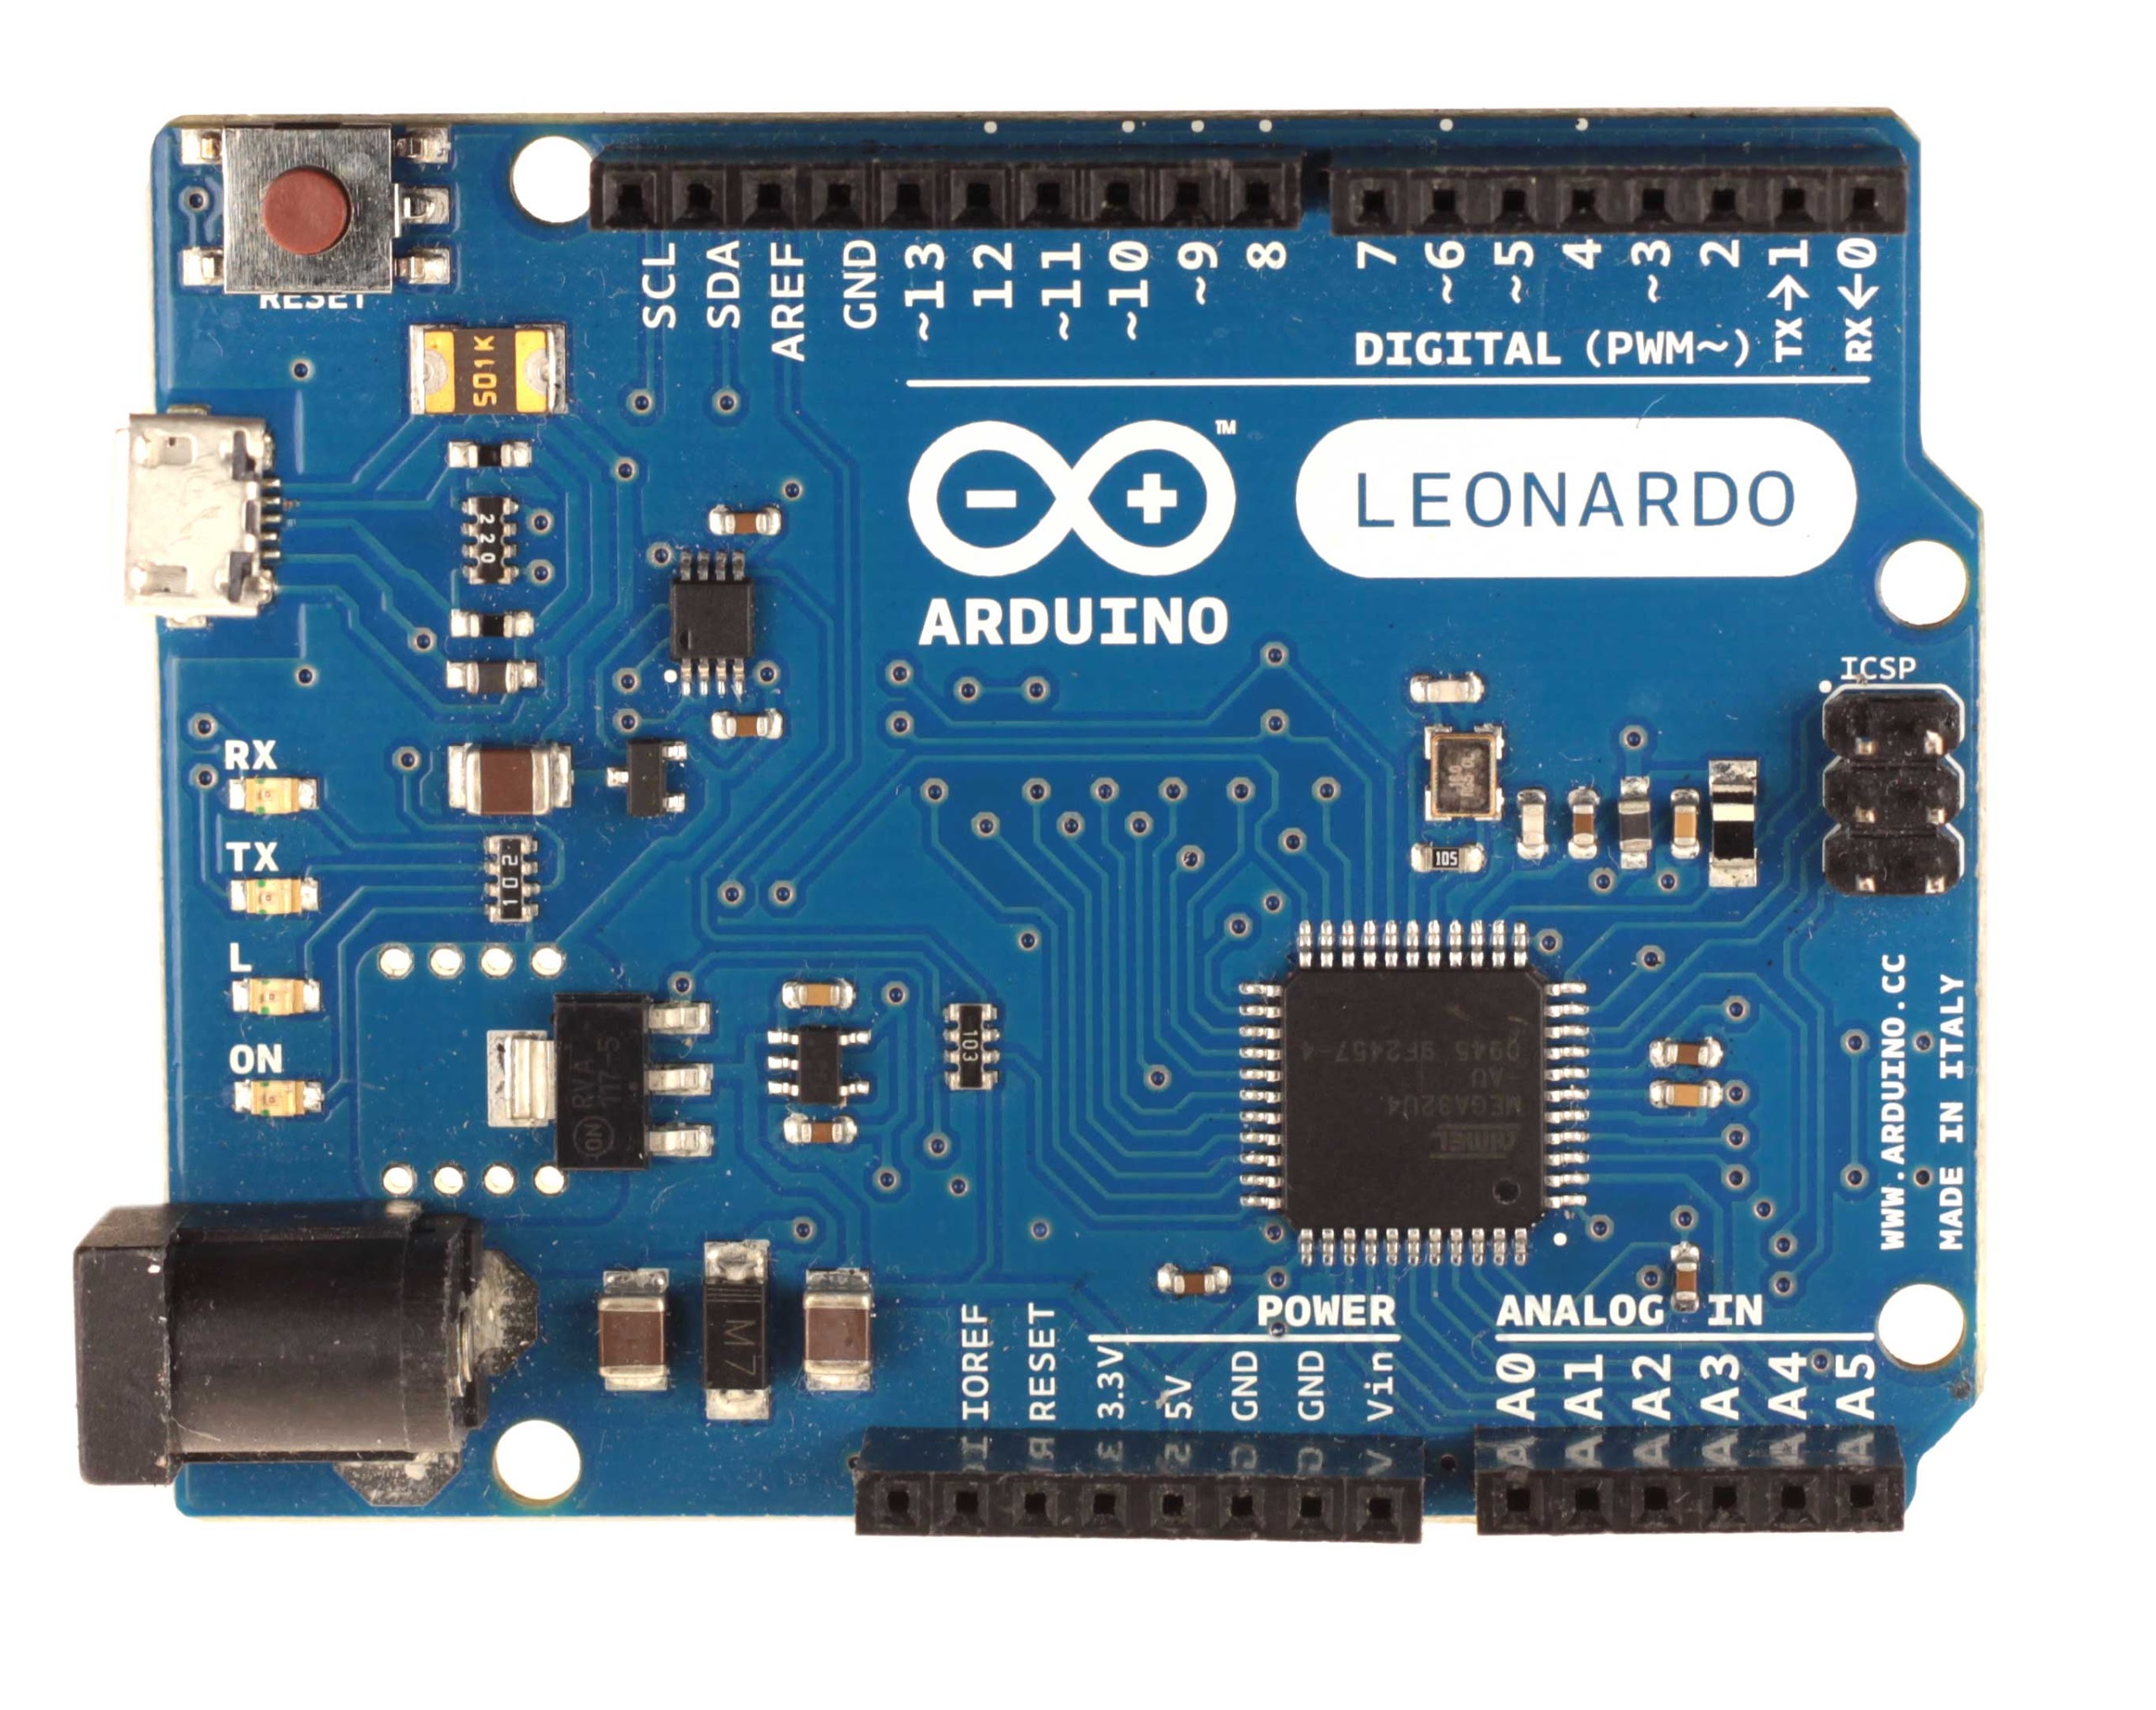
- Arduino Leonardo (already have one of these)
- Arduino ultrasound shield (transmitter and mic)
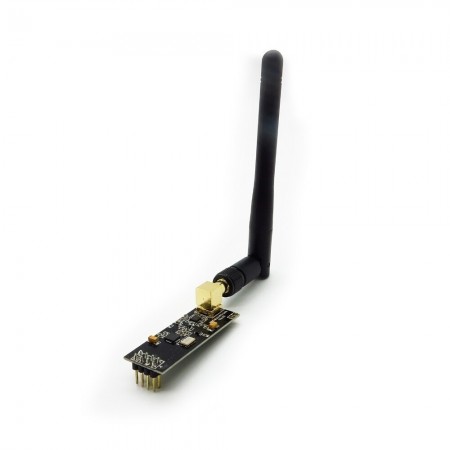
- 2.4ghz Arduino shield (already have two of these)
- Itelite DBS antenna (already mounted on the controller)
- 3D printed retractable landing gear (I have a few servos around which could be used)
I'm creating this post to hear your opinions, ideas, and also to ask for help.
Do we have any Arduino fans here who could give me a hand with the programming part?
Also, any ideas on how to change the camera's settings directly via the gimbal connectors? Anyone knows if it is possible to communicate with the camera through the UART pins to change settings?
Any suggestions and critics will be appreciated, thank you!
Well, turns out my P2V+ has fallen victim to the Wi-fi module problem. No video in the app, telemetry working fine. I tried the fix mentioned around a lot and reflashed the module using a USB serial adapter, but the board is definitely gone. My P2V+ is one of the V2.0, with a Itelite antenna installed on the controller.
I considered selling the aircraft or dismantling for parts, but here in Brazil the parts are worth nothing, and replacing the module would cost me a kidney, without knowing how long until the new module failed too. The price for an alternate FPV kit + used mini iOSD + Arduinos is less than the cost for a replacement wi-fi module here.
So, I decided to hack the s**t out of this.
I removed the wi-fi module entirely, and since the stock camera and gimbal still work through the camera's button, I plan to mod the Phantom in two phases, so I would be able to keep using the aircraft while gathering everything I need for the second phase of the upgrade or until I destroy the stock gimbal/camera which I don't intend to replace. I have a 3D printer which I can print the needed parts on.
PHASE ONE:
1. Install a 1.2ghz FPV transmitter using the video signal from the stock camera.
2. Install a 1.2ghz FPV monitor on the stock controller
3. Mount an Arduino on the Phantom and one on the controller with a 2.4ghz shield on each
4. Use the Itelite antenna for the 5.8ghz controller and the 2.4ghz Arduino comm
5. Control the stock camera's button (maybe with an optocoupler) via the Arduino for taking pictures and recording video, using the camera's LED for receiving the camera status back on the controller
6. Install the following switches and status LEDs on the controller:
- Picture button (controlled via the Arduino)
- Video record button (controlled via the Arduino)
- Gimbal tilt lever (7th channel stock potentiometer)
7. Install a mini iOSD for receiving telemetry back on the monitor
PHASE TWO:
1. Replace the stock camera with a GoPro / ZenMuse gimbal using the 1.2ghz FPV
2. Install a small 360 camera somewhere on the Phantom, triggered by the Arduino
3. Relocate compass to an external pole
4. Install a retractable landing gear activated manually and automatically via ultrasound sensor
5. Install switches for controlling the landing gear / 360 camera / hook / etc
6. (Maybe) Install a servo and hook for load dropping, controlled via the Arduino
7. (Maybe) Install a small smd LED spotlight in front of the Phantom
Components I'm considering using:
- Phantom 2 Vision + with the wi-fi module removed
- 1.2ghz FPV kit
- 1.2ghz FPV monitor with battery
- Arduino Pro Mini (I already have two of these)
- Arduino Leonardo (already have one of these)
- Arduino ultrasound shield (transmitter and mic)
- 2.4ghz Arduino shield (already have two of these)
- Itelite DBS antenna (already mounted on the controller)
- 3D printed retractable landing gear (I have a few servos around which could be used)
I'm creating this post to hear your opinions, ideas, and also to ask for help.
Do we have any Arduino fans here who could give me a hand with the programming part?
Also, any ideas on how to change the camera's settings directly via the gimbal connectors? Anyone knows if it is possible to communicate with the camera through the UART pins to change settings?
Any suggestions and critics will be appreciated, thank you!