lightbridge firmware PROBLEM (and solution) - firmware version not found by dji assistant tool

Check on internet the syntax of the command nand

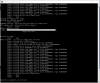
Post the result of those commands:
Here they are:
DM36x initialization passed!
UBL Product Vesion : DJI-GSP-UBL-1.0-rc10(2014-08-15)
Dji UBL Version: 1.51(Aug 15 2014 - 17:05:12)
Booting Catalog Boot Loader
BootMode = NAND
Starting NAND Copy...
Valid magicnum, 0xA1ACED66, found in block 0x00000019.
Uboot Checksum:0x7E25B44B
Actua Checksum:0x7E25B44B

U-Boot Product Vesion : DJI-GSP-Uboot-1.0-rc4(2014-07-23)
U-Boot 2010.12-rc2-svn-Dji (Jul 23 2014 - 11:14:40)
Cores: ARM 432 MHz
DDR: 297 MHz
I2C: ready
DRAM: 128 MiB
NAND: 128 MiB
Bad block table found at page 65472, version 0x01
Bad block table found at page 65408, version 0x01
*** Warning - bad CRC, using default environment

Net: Ethernet PHY: GENERIC @ 0xff
DaVinci-EMAC
Press ESC to abort autoboot in 1 seconds
Dji-Pro # base
Unknown command '▒base' - try 'help'
Dji-Pro # coninfo
List of available devices:
serial 80000003 SIO stdin stdout stderr
Dji-Pro # env
env - environment handling commands

Usage:
env ask name [message] [size] - ask for environment variable
env default -f - reset default environment
env edit name - edit environment variable
env export [-t | -b | -c] addr [size] - export environmnt
env import [-d] [-t | -b | -c] addr [size] - import environmnt
env print [name ...] - print environment
env run var [...] - run commands in an environment variable
env save - save environment
env set [-f] name [arg ...]

Dji-Pro # fatinfo
usage: fatinfo <interface> <dev[:part]>
Dji-Pro # fatls
usage: fatls <interface> <dev[:part]> [directory]
Dji-Pro # iminfo

## Checking Image at 80700000 ...
Unknown image format!
Dji-Pro # md
md - memory display

Usage:
md [.b, .w, .l] address [# of objects]
Dji-Pro # mtest
Pattern 00000000 Writing... Reading...

Dji-Pro # help nand
nand - NAND sub-system

Usage:
nand info - show available NAND devices
nand device [dev] - show or set current device
nand read - addr off|partition size
nand write - addr off|partition size
read/write 'size' bytes starting at offset 'off'
to/from memory address 'addr', skipping bad blocks.
nand erase[.spread] [clean] [off [size]] - erase 'size' bytes from offset 'off'
With '.spread', erase enough for given file size, otherwise,
'size' includes skipped bad blocks.
nand erase.part [clean] partition - erase entire mtd partition'
nand erase.chip [clean] - erase entire chip'
nand bad - show bad blocks
nand dump[.oob] off - dump page
nand scrub off size | scrub.part partition | scrub.chip
really clean NAND erasing bad blocks (UNSAFE)
nand markbad off [...] - mark bad block(s) at offset (UNSAFE)
nand biterr off - make a bit error at offset (UNSAFE)
Dji-Pro # printenv
baudrate=115200
bootargs=console=ttyS0,115200n8 rw dm365_imp.oper_mode=0 video=davincifb:vid0=0,10K:vid1=0,10K:eek:sd0=1920x1080X16,8100K mem=48MB davinci_enc_mngr.ch0_output=COMPOSITE davinci_enc_mngr.ch0_mode=pal ubi.mtd=2,2048 root=ubi0:rootfs rootfstype=ubifs ip=off lpj=1077248
bootcmd=nboot 80700000 0 4A0000;bootm 80700000; nboot 80700000 0 900000;bootm 80700000
bootdelay=1
bootfile="uImage"
ethact=DaVinci-EMAC
stderr=serial
stdin=serial
stdout=serial
ver=U-Boot 2010.12-rc2-svn-Dji (Jul 23 2014 - 11:14:40)

Environment size: 535/131067 bytes
Dji-Pro # showvar
HUSH_VERSION=0.01
Dji-Pro # test
Dji-Pro # help ubi
ubi - ubi commands

Usage:
ubi part [part] [offset]
- Show or set current partition (with optional VID header offset)
ubi info [l[ayout]] - Display volume and ubi layout information
ubi create[vol] volume [size] [type] - create volume name with size
ubi write[vol] address volume size - Write volume from address with size
ubi read[vol] address volume [size] - Read volume to address with size
ubi remove[vol] volume - Remove volume
[Legends]
volume: character name
size: specified in bytes
type: s[tatic] or d[ynamic] (default=dynamic)
Dji-Pro # help usb
usb - USB sub-system

Usage:
usb reset - reset (rescan) USB controller
usb stop [f] - stop USB [f]=force stop
usb tree - show USB device tree
usb info [dev] - show available USB devices
usb storage - show details of USB storage devices
usb dev [dev] - show or set current USB storage device
usb part [dev] - print partition table of one or all USB storage devices
usb read addr blk# cnt - read `cnt' blocks starting at block `blk#'
to memory address `addr'
usb write addr blk# cnt - write `cnt' blocks starting at block `blk#'
from memory address `addr'
Dji-Pro # version

U-Boot 2010.12-rc2-svn-Dji (Jul 23 2014 - 11:14:40)
Dji-Pro #
 
This is what I would do:
- try usb command ( you can start with USB storage to check available USB pen drives before to plug it)
-plug USB drive
-retry usb commands to list devices or storage drives
- access USB devices and try to create a file or a folder in it just to check that you can read and write to it.
-try nand command to identify nand device name
-do a backup of a working LB with nand command (I could do it for you once identified the command syntax) and save it to a file on the USB drive.
-do a restore from file using nand command.
 
Last edited:
These are some useful information about usb command extracted from TI website, you can find More info online:
Note: some characters on this forum are corrupted by emoticons, to find original article open Booting Linux kernel using U-Boot - Texas Instruments Wiki

USB Storage
U-boot includes support for loading files from USB mass storage devices into memory. This section explains steps for configuring U-Boot to enable USB and mass storage support in U-Boot. It also shows U-Boot commands used for initializing and loading files from mass storage devices connected to USB 2.0 port on the EVM.

The default U-Boot image provided in the with PSP installation has USB MSC support enabled.

Use the following sequence of U-Boot commands to load the Linux kernel image from the USB mass storage device. The files need to be loaded onto the USB disk by mounting it on a host machine first. Note: that the USB device should be connected to the EVM before running these commands.

  • usb reset This command initiates the USB enumeration process to identify all the devices connected to the USB 2.0 port. U-Boot supports devices directly connected to the USB port or via high/full speed hubs. After the command executes, the number of USB devices found on the bus and the number of storage devices detected is displayed. The command usb start also is equivalent to usb reset. For example, the following command initiates USB enumeration and identifies the storage devices attached to USB.
U-Boot> usb reset

  • fatload usb dev[:part] address filename This command loads a file from a mass storage device. For the dev parameter you should specify the number of the storage device found on the USB bus by the usb reset command. The usb storage devices are number sequentially from zero onwards. For part specify the partition number on the mass storage device. For address specify the starting address in memory where the file has to be loaded. For filename specify the file to be loaded from the mass storage device. For example, the following command loads the Linux kernel image from USB storage device 0 partition 1 to SDRAM.
U-Boot> fatload usb 0:1 0xC0700000 uImage

You can use the following additional commands to identify the device attached:

  • fatls usb dev[:part][directory] This command lists the files on a USB mass storage device. The dev and part parameters are the same as for the fatload command. For the optional directoryparameter you can specify the directory from which the contents have to be listed. For example, the following command lists the contents of the first partition on the first USB storage device.
U-Boot> fatls usb 0:1

  • usb tree This command displays a tree of all usb devices enumerated during the usb reset command execution.
  • usb info This command displays device information of all usb devices enumerated during the usb reset command execution.
  • usb read <addr> <startblock> <numblocks> This command reads the contents of the logical sectors in the mass storage device to memory.
  • usb stop This command disables the USB module and the USB phy.
All these steps can be made a part of the bootcmd environment variable.

U-Boot> setenv bootcmd 'usb start; fatload usb 0:1 0xC0700000 uImage; bootm 0xc0700000'
Thanks a lot, will try this all.
But could you please describe, what you need to upload the workig backup from device? As you can understand, I got only one, and it's broken :)
 
First of all you should understand how to do a backup of your nand flash to a USB drive. Once you do this, I will do the same command on my working device. Then we will compare memory structure of the backups and we should find that ubl starts at precise address, like u-boot and kernel. We should also find that some Data is different cause our ground unit devices have different address for synchronization with a precise air unit.
We should also find the ubi, uboot and Uimage inside the backup by means of a binary comparison between the saved backup and the files decrypted by andrew.
I hope I was clear. I don't have the time to solve your problem but if you post all your significative logs (do a lot of tests like I would do if I was you) I will help you with some hint. If you have doubt to damage your device, ask me before to send a command.
 
We need to understand memory structure because we should know what to write and where. If we flash the complete backup of the entire memory you will have my lightbridge ground unit and it will not communicate with your air unit.
 
We need to understand memory structure because we should know what to write and where. If we flash the complete backup of the entire memory you will have my lightbridge ground unit and it will not communicate with your air unit.
yes, that was clear enough!
thanks, will try to get all nesseccary data at the nearest time
 
Hi All,

I want to say thank you to all the hard work with this. There's a number of Vision Plus units that have no live view. It's a corrup NAND in the WiFi transmitter board that responds to 192.168.1.10. Using the sfh_DM36x tool I was able to resolve this and I now have my live view back!
 
Hi All,

I want to say thank you to all the hard work with this. There's a number of Vision Plus units that have no live view. It's a corrup NAND in the WiFi transmitter board that responds to 192.168.1.10. Using the sfh_DM36x tool I was able to resolve this and I now have my live view back!
Which files did you flash?
The same of the lightbridge? I don't think so. Do you want to detail the procedure?
 
Which files did you flash?
The same of the lightbridge? I don't think so. Do you want to detail the procedure?

Hi Gaucho,

All I did was run the command and flash the UBL/Application binary that was provided here. I then ran it again with a different UBL that references the 297MHZ cpu rather than the 432MHZ cpu. After that I went from the NAND boot failed message to a full blown kernel boot!

Looking at the log, it's very very similar to the logs provided here for the lightbridge unit - I think the WiFi unit in the vision plus is the same hardware! It's also well documented on the PCB with the parts clearly labelled!
 

Attachments

  • dji_afterflash.txt
    10.7 KB · Views: 982
  • dji_beforeflash.txt
    466 bytes · Views: 908
  • dji_flash.png
    dji_flash.png
    68.2 KB · Views: 1,602
  • IMG_0813.jpeg
    IMG_0813.jpeg
    894.3 KB · Views: 1,718
  • dm6467_297_ubl.zip
    5.6 KB · Views: 828
  • Like
Reactions: username
Hi Gaucho,

All I did was run the command and flash the UBL/Application binary that was provided here. I then ran it again with a different UBL that references the 297MHZ cpu rather than the 432MHZ cpu. After that I went from the NAND boot failed message to a full blown kernel boot!

Looking at the log, it's very very similar to the logs provided here for the lightbridge unit - I think the WiFi unit in the vision plus is the same hardware! It's also well documented on the PCB with the parts clearly labelled!
Supercool
Why don't you write a thread with the complete description solution, then you can reference this thread if you want.
If you do this I will reference it on the first post.
 
Hi Everyone,
Thank you for all your work on getting a solution for this problem and sharing with us so we can resolve this ourselves and not relying on the manufacturer.
I am here because I am having this same issue with my Ground Station and am not clear on the procedure.

I have read the thread completely and not sure if I can flash the firmware for the 2 missing devices without opening the LB. The post below by Gaucho sounds like this should work by just plugging into the USB Upgrade port. Is this correct?

Note3: the tool LightbridgeTerminal allows you to work on the linux embedded on the LB (air and ground unit) without modifing the hardware of your LB. Just connect to the upgrade port via usb cable, open my tool, open the serial connection on my tool, then press "enable linux" button. then type commands there, or just open your preferred terminal tool to work (tera term in example). this tool can work only if the LB is working (if the linux OS is working).

Thank you in advance for your help!
 
Supercool
Why don't you write a thread with the complete description solution, then you can reference this thread if you want.
If you do this I will reference it on the first post.

Hi Gaucho, that's a great idea! I'll get something typed up in the next couple of days. I'm hoping to get some people to send their units so I can help them out and confirm this is indeed the fix. There's lots of people with this issue and lots of "faulty" units on Ebay all because of the corrupt NAND. I like the others had blames DJI on an update causing this but now I'm not too sure. Others with the issue have mentioned that they didn't use their Phantom for some time... I personally hadn't touched the unit for over 9 months due to the rubbish weather here in Scotland!
 
Hi Gaucho, that's a great idea! I'll get something typed up in the next couple of days. I'm hoping to get some people to send their units so I can help them out and confirm this is indeed the fix. There's lots of people with this issue and lots of "faulty" units on Ebay all because of the corrupt NAND. I like the others had blames DJI on an update causing this but now I'm not too sure. Others with the issue have mentioned that they didn't use their Phantom for some time... I personally hadn't touched the unit for over 9 months due to the rubbish weather here in Scotland!

Hi Rmhome,

I would really appreciate your instructions. I have 2 phantom 2 wifi modules that stopped sending video but still sent other data. I thought they burned out. I would love to breath life back into them.

Thanks in advance!
 
Hi Everyone,
Thank you for all your work on getting a solution for this problem and sharing with us so we can resolve this ourselves and not relying on the manufacturer.
I am here because I am having this same issue with my Ground Station and am not clear on the procedure.

I have read the thread completely and not sure if I can flash the firmware for the 2 missing devices without opening the LB. The post below by Gaucho sounds like this should work by just plugging into the USB Upgrade port. Is this correct?

Note3: the tool LightbridgeTerminal allows you to work on the linux embedded on the LB (air and ground unit) without modifing the hardware of your LB. Just connect to the upgrade port via usb cable, open my tool, open the serial connection on my tool, then press "enable linux" button. then type commands there, or just open your preferred terminal tool to work (tera term in example). this tool can work only if the LB is working (if the linux OS is working).

Thank you in advance for your help!
My tool works only if Linux is correctly running. To flash nand you need to connect to internal serial port
 
Hi Rmhome,

I would really appreciate your instructions. I have 2 phantom 2 wifi modules that stopped sending video but still sent other data. I thought they burned out. I would love to breath life back into them.
Thanks in advance!
If you look at the picture posted by rmhome you see where to solder tx rx and ground. You miss just where to solder bsel and 3.3V. Start opening it...

..ofcourse this is valid if you have a phantom plus like rmhome
 
My tool works only if Linux is correctly running. To flash nand you need to connect to internal serial port


Thanks Gaucho! I will connect to internal serial on my Lightbridge Grounstation and give it a shot.

I removed my vision plus wifi module because it stopped working and installed LB. all this time I thought the internal wifi modules would burn out. I have 2 modules that stopped sending video. Now my friends phantom plus has same issue. He gets all info on his screen except for video feed. I will try to revive one of my modules and offer to swap it into his to see if this works.

Thanks Everyone!
 
gaucho,
Hi once again.
I've found a linux-friendly guy to help me with LB, and after some test he said there's no problem in reading/writing USB, so, would you be so kind to make a working backup for me? Or you need exact manual how to do this?
Thks!
 
Hi Rmhome,

I would really appreciate your instructions. I have 2 phantom 2 wifi modules that stopped sending video but still sent other data. I thought they burned out. I would love to breath life back into them.

Thanks in advance!

Hi,

I will get something typed up but it's a matter of connecting a TTL USB serial module to the UART0 pads and then shorting BSEL and 3.3V together then power up (pads are clearly marked which is a bonus). You will then use the same instructions that have been posted here by Gaucho for the LB units - You will see the same wording scrolling accross the serial console (BOOT ME) and then run the EXE with:

sfh_DM36x.exe -nandflash -v -p "COMXX" dm6467_297_ubl.img u-boot_modifiedByGaucho.img

You should then see the update happening (see screenshot in my above post).

After that, reboot device without BSEL/3.3V shorted and you should be good!
 
gaucho,
Hi once again.
I've found a linux-friendly guy to help me with LB, and after some test he said there's no problem in reading/writing USB, so, would you be so kind to make a working backup for me? Or you need exact manual how to do this?
Thks!
Do a backup and upload it here (at least the link to download it)
Then write me here which commands you used to do a backup.
This way you will save me the time to test all the commands and understand how to do.
We shall try to backup all the memory from the first byte to the last byte.
It will be interesting also to check how damaged bytes are distributed
It will be interesting also to understand which memory location are reserved for custom parameters (if there is any)
 
Last edited:

Recent Posts

Members online

Forum statistics

Threads
143,094
Messages
1,467,587
Members
104,977
Latest member
wkflysaphan4