


- Joined
- Aug 27, 2015
- Messages
- 181
- Reaction score
- 94
- Age
- 51
Hey there just thought I'd post a little thread about how I did my battery mod.I wont go into finite detail but reading this anyone with basic soldering skills could perform this mod.Now this is how I did the mod first time round, I'm no electronics wiz and am sure that I will refine the mod as I do more of my battery's I've just had many requests for a how to, so here goes.
First things first you need to get the smart battery cover open...I found this video on YouTube although its for a phantom vision2 it's practically identical to the p3's cover. I found that with a sharp hobby knife there is no need to heat it up as he does in the vid.The top cover of the smart battery has four tiny plastic tabs the joins it to the main body of the smart battery's cover but just take your time and using some small flat headed screw drivers etc you'll pry it off in a jiff>
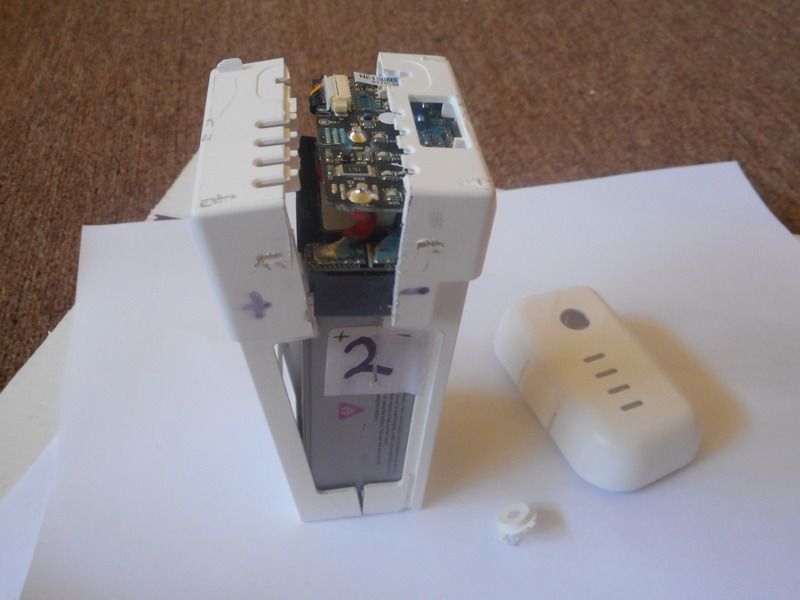
After you have opened it it's time to grab your drill out ...start with a thin bit roughly the size of the lead in a pencil to make a pilot hole for your larger bit.I used rated 20amp wire which is sufficient for the current draw and drilled out holes through the top cover through the pilot hole I made with a bit that suited the size wire I was using>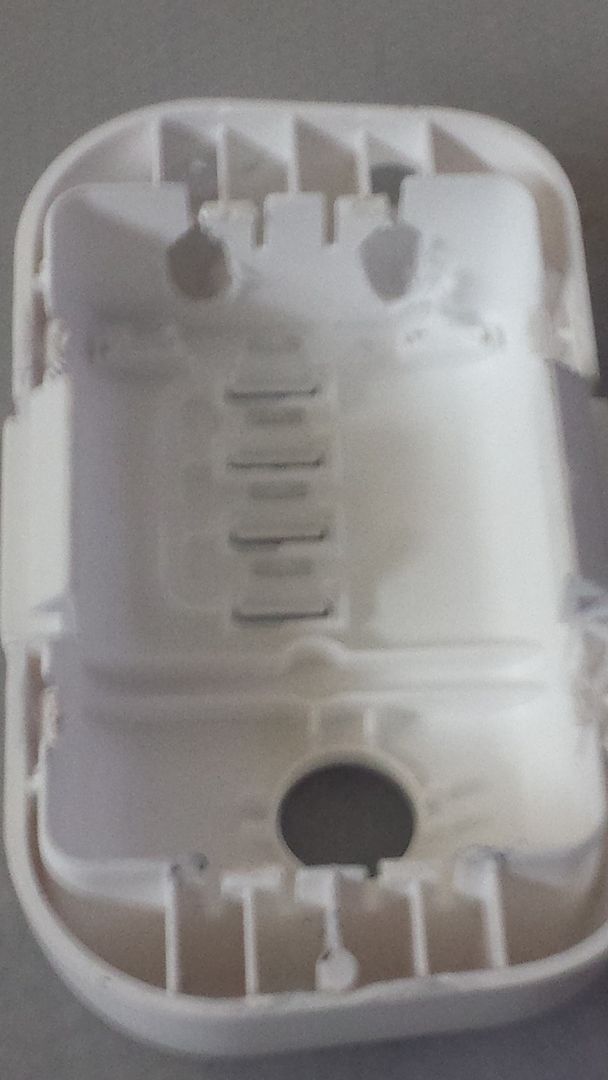
Next you will want to drill two more pilot holes in the main body of the battery that line up with the holes you made in the top cover to poke the wire through.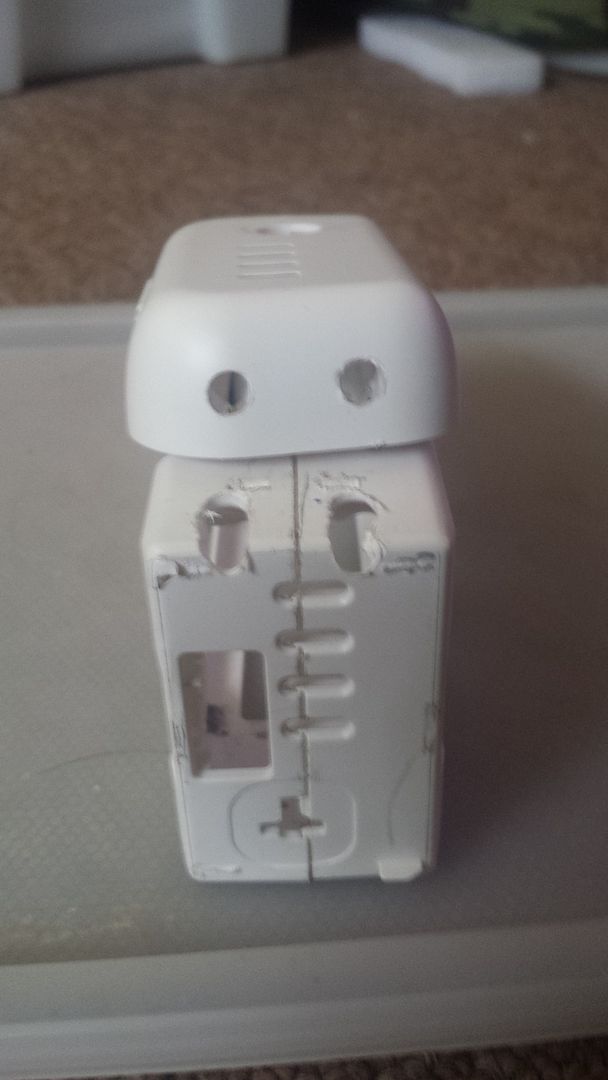
Then the fun begins the positive and negative terminals are coated in some sort of epoxy goop now I tried heating it with a hot air gun to no avail so don't waste your time.Anyway just sit the iron on the soldered joints for a few second to get the goo to melt away.Next add some solder to the existing connections enough to hold the new wires on it. Having tinned your wires like this guy does
then solder your wires to the existing positive and negative connections inside the smart battery. Leave enough wire to play with then its time to reassemble. Ok start with one half of the smart battery main body and poke one of your wires through it's a bit fiddly but just take your time and repeat with the other half of the main body. Once you have the two halves together add some little dobs of super glue to the main body to seal it up. Then replace your smart battery's power button and poke your wires through the smart battery top squeeze it back on add a few more dobs of super glue to keep it on and the hard bits over.
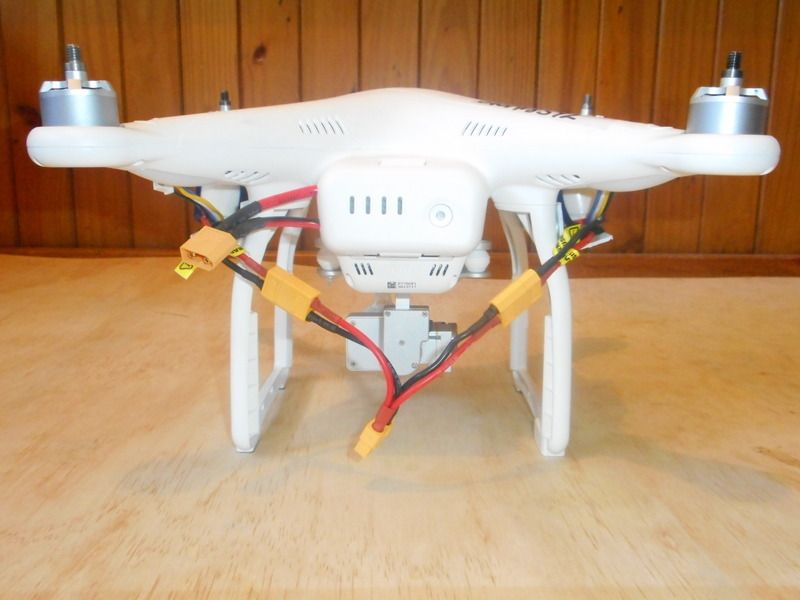
Next get some heat shrink and solder and some xt60 connectors which are available at any electronics shop/hobby store and proceed to solder your connector on
Now you will also need a XT60 Y harness to run the batteries in parallel you can get them off hobbykings website ebay etc.XT60 Harness for 2 Packs in Parallel (1pc)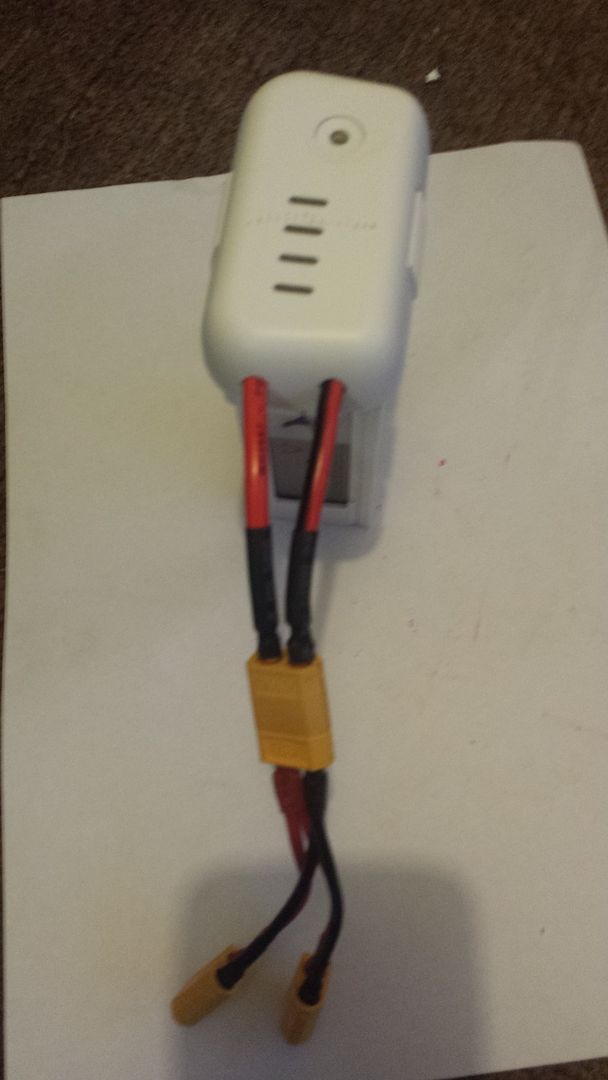
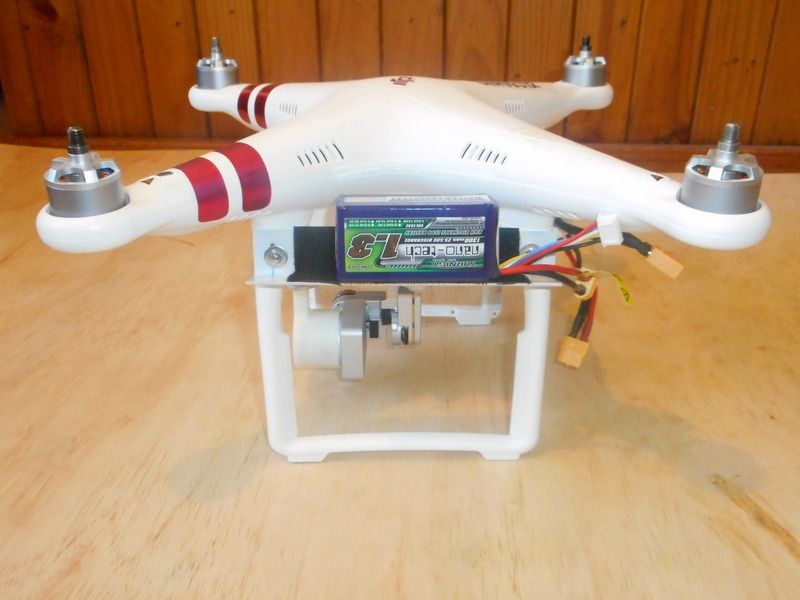
Now since I was not able to find a dual battery holder for the phantom3 anywhere I had to search for something off the self. What I found at my local hardware store was some plastic plasters capping its very strong,light weight,durable easy to work with and cheap.....ticks all the boxes.Peer Industries 20 x 20mm x 2.4m Plasterers Capping Trim I cut a couple of 13.5cm lengths and drill some holes through the tops of the legs carefully as not to drill through your antenna wires, just move them out of the way while drilling. A couple of little bolts washers and nuts later add some velcro for your battery's and your done. The other great bit about the capping that I got is that as you can see in the pics it's not right angled so the battery's actually lean into the bird. The battery's I'm starting with are these Turnigy nano-tech's 1300mAh 4S 25-50C lipos Turnigy nano-tech 1300mAh 4S 25~50C Lipo Pack (AU Warehouse)
Anyhow the whole mod including the batteries was under $50 .........any questions ask away")
https://docs.google.com/document/d/1NUuhPPh1BoesdXXTFsT2HXic3qHCCKWehNnHQS0k1Yo/edit
First things first you need to get the smart battery cover open...I found this video on YouTube although its for a phantom vision2 it's practically identical to the p3's cover. I found that with a sharp hobby knife there is no need to heat it up as he does in the vid.The top cover of the smart battery has four tiny plastic tabs the joins it to the main body of the smart battery's cover but just take your time and using some small flat headed screw drivers etc you'll pry it off in a jiff>

After you have opened it it's time to grab your drill out ...start with a thin bit roughly the size of the lead in a pencil to make a pilot hole for your larger bit.I used rated 20amp wire which is sufficient for the current draw and drilled out holes through the top cover through the pilot hole I made with a bit that suited the size wire I was using>

Next you will want to drill two more pilot holes in the main body of the battery that line up with the holes you made in the top cover to poke the wire through.

Then the fun begins the positive and negative terminals are coated in some sort of epoxy goop now I tried heating it with a hot air gun to no avail so don't waste your time.Anyway just sit the iron on the soldered joints for a few second to get the goo to melt away.Next add some solder to the existing connections enough to hold the new wires on it. Having tinned your wires like this guy does
Next get some heat shrink and solder and some xt60 connectors which are available at any electronics shop/hobby store and proceed to solder your connector on

Now since I was not able to find a dual battery holder for the phantom3 anywhere I had to search for something off the self. What I found at my local hardware store was some plastic plasters capping its very strong,light weight,durable easy to work with and cheap.....ticks all the boxes.Peer Industries 20 x 20mm x 2.4m Plasterers Capping Trim I cut a couple of 13.5cm lengths and drill some holes through the tops of the legs carefully as not to drill through your antenna wires, just move them out of the way while drilling. A couple of little bolts washers and nuts later add some velcro for your battery's and your done. The other great bit about the capping that I got is that as you can see in the pics it's not right angled so the battery's actually lean into the bird. The battery's I'm starting with are these Turnigy nano-tech's 1300mAh 4S 25-50C lipos Turnigy nano-tech 1300mAh 4S 25~50C Lipo Pack (AU Warehouse)
Anyhow the whole mod including the batteries was under $50 .........any questions ask away


https://docs.google.com/document/d/1NUuhPPh1BoesdXXTFsT2HXic3qHCCKWehNnHQS0k1Yo/edit
Last edited:


